Showing posts with label C-Tie the Knot. Show all posts

Wednesday, March 23, 2011

Glam Wedding Dress Card


I have been struggling with locating my paper crafting mojo in recent weeks (hence the lack of posting).  Every so often I feel like my mojo takes a holiday and leaves me floundering.  I have found all sorts of activities and interests that I have let seduce me from the craft room while awaiting the return of my designing mojo.  Well tonight I put my foot down, designed a card, and made time for my Cricut.

I have always loved this pretty wedding dress cut from the Tie the Knot cartridge but I had not previously done much with the dress.  I needed a wedding card and I thought it was time to play with this dress.  I cut the shadow layer in a creamy white color.  The icon cut was completed in smooth white cardstock. And the overlay piece was cut (cutting twice) in a heavy white glitter cardstock.  


The base card was cut in ecru cardstock by welding two mirror image shapes from the Lacey Labels cartridge.  I trimmed the edges of the card front with a silver paint pen.  I also cut a top layer background in the same shape, but half an inch smaller than the base card, in a subtle yellow-cream floral tone on tone print.

I finished card with diamond gems using my I-Rock tool. I added silver paint to the dress sash and topped it with gems. I also added cream organza ribbon and flowers to soften and bling the card a bit.


I will be spending the weekend at the lake with my scrappy girlfriends and if anyone can help me find my missing mojo, this group can! So hopefully my blog will soon be back to normal.

Monday, October 25, 2010

BBTB2 Banner & Blog Hop


Hello everyone, welcome to the monthly Bitten By the Bug 2 blog hop. You may have arrived here from our sweet Carole's blog, or you may have just dropped in to check out my monthly project. If you did not start at the beginning after you finish here you may want to go to BBTB2 and check out the fabulous banners made by my fantastic design team sisters!

This week's challenge cut was selected by our design team sister, the lovely Beth (Runs with Scraps). Beth asked the design team to use any of the banners on the banner feature from the Country Life cartridge. I do not have this particular cartridge but there are other several other banners on several other cartridges. I used two different banners from two different cartridges to create my HAPPY FALL banner.


The scalloped base banner was cut using Tie the Knot. The floral print banner with the rectangular topper is from Straight from the Nest. I added an additional triangle from George and Basic Shapes to create more interest. The maple leaf flourish decoration across the top of each section is from the seasonal Thanksgiving cartridge, as are the images on the first, last, and middle banners. I used the cornucopia, the turkey, and the corn for the image banners. I finished each section of the banner with the I-Rock and assorted gems.


Orange sheer ribbon was laced through the holes on each section of the banner. I then tied the ends of the ribbon to the iron sconces on my mantel. The orange was a perfect color in that it blends well with the cardstock colors and the leave garland on the mantel. I love decorating for fall and this fun banner added to the overall effect.


So did I mention a blog hop??? Did I tell you that with the blog hop comes BLOG CANDY? What? I forgot to mention that??? I have great blog candy for one lucky reader!!! I am giving away a $25 gift voucher from CUSTOM CROPS so one lucky person will get to do a bit of FREE shopping!!! All you have to do is leave a comment under this post. A random winner will be selected on Thursday of this week.

After you post your comment you will be continuing along on the blog hop. Your next stop is at our amazing Donna's fabulous blog. I cannot wait to see her awesome project; she inspires me every single week!!!

Thanks for coming by today. I will be back tomorrow with another new project.

Monday, June 28, 2010

Tea & Sweet Shoppe Card AND BBTB2 Blog Hop


Hello and happy Monday.  Welcome to my Tea and Sweet Shoppe!  This week's challenge cut at BBTB2 is the Genie Lamp from the Paper Doll Dress Up cartridge.  I ALMOST went with a cute oasis scene on my card but then I decided to take the road less traveled and add my lamp to a line of assorted teapots.


I have to tell you that I do not think I have ever used this many cartridges on a single card.  I used Paper Doll Dress Up, Just Because Cards, Sweet Treats, Tie the Knot, George, A Child's Year, Dreams Come True, Once Upon A Princess, and Cindy Loo.  Each of the teapots is from a different cartridge, as are the cakes. 


I like the store window effect I created by welding two shapes from George in Design Studio and then adding layers.  And of course I had to add pearls and gems to my sweets and shelving.  I used copic markers and my Ranger white gel pen to embellish the teapots, cups, and sweets.


I kept trying to find a way to add large flowers and ribbon, but the additions distracted from my main store window effect so I did not use them.    Instead, I finished the card by adding a swiss dot cardstock mat inside the card and cutting a "sweet" phrase with the Cindy Loo font.


I believe I mentioned a BBTB2 BLOG HOP!!  Yes it is our blog hop week.  I have some sweet blog candy up for grabs - just leave a message below and you will be in the drawing for a CUSTOM CROPS GIFT VOUCHER!!!  That's right!  Free shopping!!

After you leave your comment below and become a follower if you'd like, you should hope on over to the blog of the VERY TALENTED THERESA!  I cannot wait to see what Theresa made this week; she is such an amazing artist- quickly - go!!

Happy hopping!

Monday, February 8, 2010

Gypsy Spot Mini Mailbox Challenge


Happy Gypsy Spot Tuesday!  This week's challenge at the Gypsy Spot is to decorate a Target-like mini-mailbox.  As you can see, the mailbox matchs yesterday's BBTB2 card.  I will admit that the mailbox came first, then the card.


I began by covering the mailbox with a 4 x 12 inch strip of pink polk-a-dot cardstock.  I knew I wanted to use the Pink Paislee Cupid paper in some way, but I was not certain about how to incorporate the large flower print.  And then I remembered circle punches!!  I cut several of the flowers from the Pink Paislee paper using 1.25 inch and .75 inch circle punches.  I then raided my Prima floral and gem brad stashes and then I cut two mailbox door covers from the Pink Paislee paper.


I used cricut magnet material and cut two hearts, one for each end of the mailbox.  I cut two decorative hearts in pink cardstock and covered the magnet material.  I then cut the xoxo layers in cardstock.


I attached the xoxo's to the mailbox lower side egdges.  I created layered flowers using the prima flowers, circle punch flowers and centers, and gem brads.  Using large glue dots I affixed the flowers to the sides of the mailbox and the flag. 


I am really pleased with the end result of this set.  It is fun, sassy, and feminine!

Sunday, February 7, 2010

BBTB 2 Heart Card - Yet Another Valentine Moment


Happy Monday!  It is, of course, time for the weekly BBTB2 challenge post.  This week's challenge cut is the Heart card from the Wild Card cartridge.  We could use this heart shaped card anyway we wanted. I went with the seasonal "go to" and created a Valentine card.


I cut the basic Wild Card Heart card in white cardstock.  I then used printed paper in colors of white, pink, green, blue and red and cut the card front only.  I switched cartridges at this point and cut the shadow scalloped heart from the Sweethearts cartridge in pink cardstock.  I affixed the printed heart to the front of the scalloped heart.  I then attached the scalloped card to the Wild Card Heart basic card.


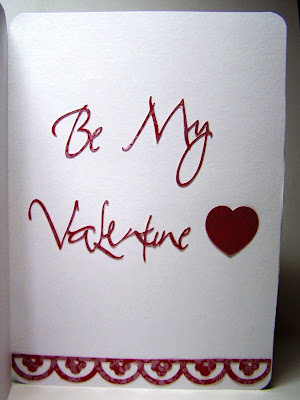
I used red foil paper and cut assorted embellishments from Wild Card and Tie The Knot.  I cut the "Be My Valentine" phrase (from Wild Card) for the inside of the card from the red foil also.  I ran the foil cuts through the Xyron machine to apply adhesive, then I set them aside for later use.


My final Cricut cut was the sweet XOXO cut from Tie The Know.  I cut this is a Pink Paislee gingham, the reverse side of one of their "Cupid" cardstocks.  I cut the XOXO shadow in Core'dination cardstock and attached the two layers together.  I then affixed the cut to the lower third of the card front.


The flower embelishments on the front and inside of the card were made using prima white daisys, prima solid and gingham flowers and paper punches.  I used a 1 1/4 inch circle punch and cut the circle flowers from the opposite side of the gingham paper.  I then used a 3/4 inch circle punch and cut flower centers from the same paper. I hand trimmed a flower stem from the paper and attached it "growing" from the XOXO cut.  I used large glitter brads to affix the four layers of flowers together. I finished the card front by attaching the foil embellishments.


Inside the card is the red foil Valentine phrase, yet another of the layered flowers and a delicate green stamp to represent the stem.  All this card needs is a little note and a signature!


Please come back tomorrow for this week's Gypsy Spot challenge - today's card is part of a matching Valentine set which will be completely revealed tomorrow!! Sneak peek in the final photo in the this post.

Monday, February 1, 2010

Gypsy Spot Challenge - 3M Adhesive Backed Paper


Hello bloggers, happy Tuesday.  This week at the Gypsy Spot we were challenged to use 3M's Post It brand paper, which has adhesive on the back with a peel off cover.   I received three 8.5 x 11 inch sheets of the 3M paper - red, pink and white.  So of course I immediately thought VALENTINE'S project. 


I used my Gypsy and five cricut cartridges to design and cut this card:  Sweethearts, Tie the Knot, George, Graphically Speaking and Winter Woodlands.  Since so much of the nation is experiencing winter weather this Valentine's day, I chose the heart snowflake cut on Tie the Knot as a primary accent cut. The tiny red hearts in the middle of the heart snowflakes were cut from George.  I added small snowflakes from Winter Woodlands to accent the three larger snowflakes.


The layered scalloped hearts are from the Sweethearts cartridge as is the word LOVE in the middle of the top heart.  The word YOU is from Graphically Speaking.  I wanted a plain font so as to not draw attention away from the word LOVE


The base card was cut from Sweethearts and the rectangle on the top of the card was cut from George.  I used a new Valentine Cuttlebug embossing folder on the background rectangle to add texture.


The flower is a Prima product and can be purchased at Custom Crops. The ribbon was from my stash.  The brads are Stampin' Up brand. I hope that you and you Valentine snuggle up warmly this Valentine's Day!!


Note: The cut file has been added to the list of cut files at the right - 3M Love Valentine Card.

Monday, January 25, 2010

BBTB2 Love Stamp Cut


I am running a bit late today on getting my BBTB2 project loaded to both the BBTB2 site and to my blog.  The challenge this week was to use the Love Stamp cut from the Sweethearts cartridge.  I made this sweet valentine which includes cuts from five different cartridge:  Sweethearts, Calligraphy, Love Struck, Easter 2010 and Tie the Knot.


I used Bazzill pink bling cardstock, smooth white cardstock, one sheet of Basic Grey Sugared cardstock and two prints from SEI's Juliette line.  I love the shimmer in the SEI paper!!!


I finished off the front of the card with Prima flowers and American Crafts ribbon.  Inside I added the phrase "Be My Valentine" from the Calligraphy cartridge.  I also cut a an extra heart from Sweethearts and sweet border from Easter 2010. 


I love this couple on Love Struck.  Speaking of Love Struck, WHAT A GREAT CARTRIDGE!!!!  I am so enjoying the 2010 seasonal mini carts.  Be sure and get your before they are gone!!

Thursday, January 21, 2010

Weekend at the Lake Scrap Peek #2


Today's peek at my weekend crop projects will feature my daughter and her activities.  Do you detect a pattern here?  Yesterday was the older son, followed by my daughter - the middle child - today.  Hmmmm.  Who do you think will be featured tomorrow?

This two page layout features Bethany and her friend Bailey who attended the Charleston Green Fair.  I was especially excited to be able to use the letter G from Tie the Knot cartridge for my capital letters in the page title.  I welded lower case Plantin to the Tie the knot caps.


Bethany and Bailey were photographed with the event "mascots" and the picture appeared in the local Charleston paper.  For those who may not be familiar with our State, Charleston is three hours away and we do not get the Charleston paper in Aiken.  Silly us, we get the Aiken Paper.  Bethany did not get a copy of the actual newspaper for me, but she did send me a link to the on-line pdf of the article.  I was able to the save the pdf article and print it onto cardstock.  I also was able to right click the photo, save it and print it and create this double page layout.


You may recall the first page of the two page layout below - the left page was created for a BBTB2 challenge using the phase cut In Style from Graphically Speaking.  I also designed a second page for the layout.  I have found that 99% of my layouts are double page spreads.   When I used the left page for BBTB2, I printed the photos out quickly with dying toner.  For the final scrapbook version, I printed the photos at Shutterfly and cropped them to fit the layout.


I really like how this layout came out. I was especially pleased with the dress stands and the spools of thread.  The dress stands were made using a key cut on JOTS and Belle's dress from DCT.  There is a spool of the thread with a needle on the other Disney princess cartridge, but of course I do not have that cartridge.  So I used George and created my own spools.  The spool was made by welding two round corner triangles together with a barrel cut in the middle.  I then cut the barrel in the color I wanted the thread to be.  I had cut a snip of silver paper for the needle and used my markers to draw in the thread.


In my ususal style, I finished both layouts with doodles and dots.  I will add that I do use a ruler to draw the lines on my layout... My hand is not steady enough to trust lines to free hand style.