Showing posts with label C-George. Show all posts

Monday, May 16, 2011

FAB Sunglasses and Purse with Forever Young


Happy Monday! I am so excited to share today's Bitten by the Bug 2 project with you! Our team leader, Heather, selected this week's challenge cut - the sunglasses from Forever Young. I LOVE the sunglasses and other fun cuts on Forever Young!! I also love all of the 3D purse options on FY! So sunglasses and purses were the perfect companions for today's project.


I began with a large purse, 9 inches tall (about 16 inches wide). I cut the purse in double sided cardstock, polka dot side facing out. Using George and Basic Shapes, I welded a circle and oval to create the front panel of the purse and I cut the panel twice in this fun pink, green and aqua print.

I used lime green cat's eye chalk to "ink" the edges of the front panels as well as the tiny gingham trim pieces (also "build" in George to fit the base purse).


I cut the sunglasses in three layers, the icon cut in hot pink, the shadow cut in a green polka dot, and the dark lime glass lens.  I used A LOT of pink punch Stickles on the glasses frames - I wanted for the frames to appear to be made of sparkling pink plastic!  I finished the glasses with dark brown dots on the lens and a touch of red stickles in the flower cutouts on the corners.


I created hybrid flowers for the purse, again using cuts available on Forever Young.  Cut the flower as it appeared on the cartridge EXCEPT, I cut four of the largest layer of petals.  I then folded the four flowers into quarters and created flowers very similar to the 3D Mother's Day flowers from Cricut.  The only difference is that this flower already had leaves attached.   I used the same green cardstock for the shadow cut as I used for the glass lens.  I used polka dot for the icon cut, a double sided hot pink cardstock for the larger folded petals, bright pink and white for the middle size petal layer, and yellow for the tiny flower centers.  I finished the flowers with two tiny button centers - just like the original Cricut flowers.  These flowers are SOOO easy to make and look so cute.


I attached one of the flowers to the closure on the purse and used pop dots to "hang" the sunglasses on to the edge of the purse.  I also used pop dots to attach the second flower to the lower left corner of the purse.


To embellish the front of the purse I cut two strips of coordinating paper - the same tiny gingham that was used on the upper trim, and the reverse side - an Argyll print.  I glued the two strips to the lower front of the purse and then added the flower.  Finally, as I was putting away the Making Memories paper set that was used to make this project, I found this fun LAUGH cardstock sticker and I knew it would be the perfect finishing touch!! 


Thanks for popping by today.  Please do go over to BBTB2 and check out everyone's projects.  SOOO cute this week!!!  

Friday, May 13, 2011

Christmas Berry Card & Blogger Up Date


Hello again blog-land. For those two hermits out there that were not aware, Google Blogger has been down for the last two days.  It "ate" comments and scheduled future posts, in addition to locking out the blog owners.  For those of us who are far too involved in our on-line lives (can you say, Get a life, Susan?), this was very stressful!  And worst of all - It interrupted my Berry Week!  I guess you will get yesterday's berry project at some point in the future.


Today's berry card is "Christmas Berries".  And no, this is not a real plant.  I took one of the Christmas berry cuts from the Christmas Noel cartridge (which can be referred to as Christmas or Christmas Solutions) and crossed it with a pine stamp, creating a hybrid Christmas berry branch!  I then topped the branch with this sweet little red bird (wonder if he ate too many red berries?).


I went back to the Preserves cartridge and found this great shaped matting.  I cut the shape in dark brown cardstock and white with green print cardstock.  On top of that I added two oval mat cut with George .  I stamped the Merry Christmas sentiment with a Stampin' Up stamp and SU ink.  I tied a red Christmas tree ribbon around the card topper before attaching it to the cream colored base card.


Inside the card I used another Stampin' Up Christmas stamp to add a message.  There is still plenty of space to sign the card and add a personal message.

The base card was cut in speckled cream cardstock and red, green and cream stripes.  I used mono adhesive and attached the stripes to the cardstock BEFORE cutting the base card.  I then positioned the cardstock on the mat so that 3/4 of an inch of the stripes would cut with the card.  The base card was cut using Christmas Cheer.


I am hopeful that blogger continues to function properly and that this post does not get lost.  If there are no service interruptions I should be back tomorrow with another new project!!

Monday, May 2, 2011

Celebrating with Woody and Bullseye


Sheriff Woody is having a "rip-roaring howdy" kind-of day as he and his trusty horse, Bullseye adorn this cute layout for my adorable nephew, Carter.  Carter will be three in a little over two weeks and his Aunt Susan is working away on his scrapbook.  Carter adores Toy Story so of course I must include a few TS related layouts!


I am worried that Carter will notice that Aunt Susan dressed Woody in the wrong colors.  I did not look at a photo of Woody, but instead just selected papers that I liked.  I am hoping that IF Carter notices, someone will tell him that his is Woody's OTHER outfit!  Or perhaps they could say Woody's regular clothes are in the wash???  :-)  Maybe Woody had to change clothes because "there's a snake in [his] boot."


Not to be out done by Woody, Bullseye is looking pretty cute too.  And again, I did not look at Bullseye's photo - let's hope that I got him somewhat correct.  I am betting that the hooves are the right color!!!  I added dots to represent the stitching which holds Bullseye together.


In addition to the Toy Story cuts, I also used the cowboy hat and boots from Paper Doll Dress Up.  I also used George and Basic Shapes to cut the photo mats.  I added silk flowers over the cricut cut flowers on the rope and on the right hand page.  

The cardstock that I used is actually from a fall themed line, but I thought the colors worked wonderfully with the western theme. The colors are so warm looking - and they match the colors I used on Woody and Bullseye.


I hope you enjoyed this layout - and forgive the smudge on my camera lens (the blur in every photo is a smudge).  I have since cleaned the camera lens, but not before photographing tomorrow's project!  Oops.

Tuesday, April 26, 2011

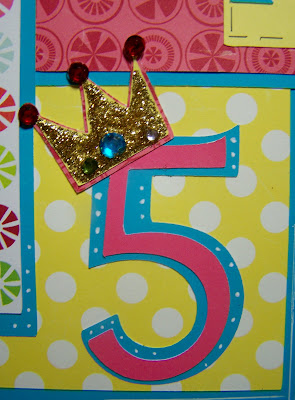
Happy 5th Birthday Cricut Day 2


Happy Birthday, Cricut!  It's day two of the Cricut's birthday celebration and I have another birthday layout to share.  This was the second of the three layouts that I submitted to the Cricut Birthday Celebration.  I love the large background doily from the Basic Cake cartridge, especially in Cricut Green!

**** UP DATE **** This layout won!!! At 6:37 am this morning Cricut announced that this layout won for best Cricut theme!!!!  Woo-hoo!!  I am so excited that I am having trouble typing!!!


Using my lastest Cricut Circle cartridge, Cricut Everyday, I cut the large logo cricut circle, then used scissor to cut away part of the top circle to create the letter "C" in the work Cricut.  I used bright colors - Cricut green, pink (for the Pink Cricuts) and blue because I have a blue expression. 


I have always loved this party horn cut from Celebrations.  I cut the top layer twice and used scissors to cut away the mouth piece on the pink cut and to keep only the mouth piece on the blue cut.  The shadow cut is in dark blue.


I put a fun party hat on the "C" cricut head - It is Cricut's birthday after all.  I added a flower behind the top of the hat and I added a gem to the middle of the hat top.


I have one other thing to share today.  I ordered a glass tile backsplash tile kit from DIY Network last week and it arrived this afternoon.  The box claimed that the entire project could be done in two hours, which I did not believe, but I decided to install my tile last night anyway.  Over all, including cleaning up, the tile took me about three hours to cover 15 square feet.  I hope you don't mind, but I am going to share photos of my first tile project.


I went with Almond colored tile, which has a touch of metallic copper and gold as well some tans and light browns.  I thought that the almond would work with our white cabinets and multi colored earth tone counter tops. 


The almond tile also blends well with the 4x4 ceramic tile over the sink and cook top.  I just need to do a few finishing touches, but the work is really finished. 

I will be back tomorrow to share my final Cricut birthday layout.


Monday, April 25, 2011

Happy 5th Birday, Cricut


Let the Celebrations begin!!!  It's a happy birthday party for Cricut and we are all invited! I cannot wait until tonight's release of the Cricut Expression II machine - the limited anniversary (birthday) edition!  Like so many of us, I will be tuned into HSN tonight at midnight to see Jinger start get the release going! 


I am taking a break from making Cricut birthday hats to complete this post.  I have invited MFK (my friend Kathy) and Kimberly over for the 9:00 pm Everyday Cricut livestream.  And then they are going to stay for the midnight show!!


This is the first of my three Cricut contest birthday layouts that I am sharing.  To be honest, it is my least favorite and I almost did not even send it.  I truly like my other two and I will share those over the next two days.  What I do like about this layout are the cardstock choices.  I think the papers are fun and bright without screaming "child-like".


So now that I have shared my so-so layout, you can look forward to two better layouts tomorrow and Wednesday.  I promise they will be more impressive.  Also, I will share photos of Kathy, Kimberly and I enjoying the Cricut festivities tonight!!!

Monday, March 21, 2011

Rainy Day Friends with Paisley and Hello Kitty


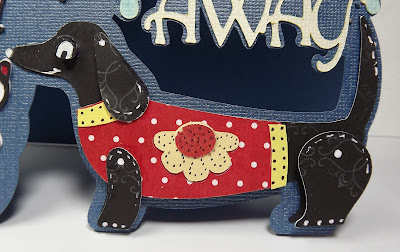
Happy Monday!  It is a fun Bitten by the Bug 2 Monday where the featured cut of the week is this fun little wiener (Dachshund) dog from the Paisley cartridge.   Our sweet design team sister, Melissa, chose this cut and I am soooo pleased that she did.  What a great cut! 


I combined my wiener dog with a kitty, Hello Kitty actually, so that it could be “raining cats and dogs”.   I remembered this great April showers Hello Kitty and decided that Kitty would want to share her umbrella with this sweet pup.


The phrase Rain, Rain Go Away is from the Nursery Rhymes cartridge.  The NR cartridge is a truly sweet cartridge and one that I do not use nearly enough.  I used a Copic marker and colored in the raindrops on the words.


I used the shadow cuts on the Dachshund, Hello Kitty, and the Rain phrase, welded together, as the front of the card.  I welded the shadow cuts to a rounded corner rectangle from George and Basic shapes to create the card.   To add a bit of dimension I used pop dots on the dog parts.


If you have not already done so, please do go by the Bitten by the Bug 2 blog and check out the design team projects.  I was completely WOW’ed by some of the DT projects!!!

Monday, March 14, 2011

Hey There Chickies


Happy BBTB2 Monday.   The challenge cut at Bitten by the Bug 2 this week is the Chick from the Easter 2010 cartridge.  I really love this cartridge!  The cuts are traditional Easter images - bunnies, chicks, eggs, bows. lambs, basket, etc.  If you do not own this cartridge, I highly suggest you try to find it.


Cut the challenge chickie in three different sizes and three colors/prints and created a welded shadow using Design Studio.  Using in pop dots I layered the chickies on the front of a circular card.   

The card itself was created using George and Basic Shapes and Easter 2010 cartridges.  The base card is two welded circles.  The circle is topped with the white textured cardstock doily cut from Easter 2010 and two Easter print circles from George. 


I cut the base card with pink orange peel textured cardstock.  For the time being the I left the inside of the card empty.


I finished the front of the card with flowers, orange Stickles, gemstones, and a script Happy Easter stamp.


Be sure to go to the BBTB2 site and check out all of the design team projects!

Friday, March 4, 2011

Cricut Circle Crop - Atlanta

Hello everyone.  I am here in Atlanta getting ready for the first ever Atlanta Cricut Circle Crop!!!  Can you say EXCITED???  Thursday night I met 18 other women who are also victims of this horridly addictive disease we call CRICUT!  Yes, every one of them is totally and completely Cricut addicted!!

Susan in SC, from the Cricut Message board, and I joined a large group for dinner at Carrabas and then a smaller group for dessert at the cheesecake factory.  (Little side note:  how does one remember the difference between desert and dessert?  Dessert has two S's and you know you always want more dessert than you want desert.  Okay that was our lesson for the night).   I am stuffed and I suspect I will have to live on water, fruits and veggies next week as all of my weight watchers points have been spent!


Back the the Circle Crop.... The last I heard there are 44 or so of us attending.  Theresa Collins will be popping in to share her latest kit with us and walk us through assembly.  Provo Craft has promised great door prizes and loads of fun. 

Two FABULOUS women from the MB arranged the group dinners (yes, I said dinnerS - there is another Friday night) and a couple of swaps.  There are two swaps - a goodie bag swap and a ribbon swap.  I brought 25 one yard lengths of Stampin' Up ribbon to trade in the ribbon swap.  And I made (with the much appreciated and enjoyed help of MFK and her sister Kimberly) 50 3.3 inch boxes to hold the circle trading cards.  Since everyone is supposed to bring 3x3 cards I thought they could use boxes in which to store their cards.  The boxes are my contribution to the goodie bag exchange. 


The boxes were a quick cut on the 12 x 12 mat using George and Basic Shapes, some quick pre-marked scoring, a Cricut Circle logo on the front and my signature stamp watermarked onto the bottom of the box.


Best of all, I designed the box so that it only needs two lines of glue to hold it together!!


My 3 x 3 Circle Trading Cards were created using my computer and printer, as well as the Cindy Loo cartridge.  I don't know WHAT I would have done without Kathy's and Kimberly's assistance on assembling the cards.  The Cindy Loo cut was a challenge to cut this small.  After Kathy and Kimberly left I finished the cards by adding gems using my I-Rock gem setter and color on the bird and some leaves with Copic markers.    The back side of the card has my name and Busy with the Cricky information.


I will keep you posted on  how the Cricut Crop developes..... I am so ready for all of the fun!!!  I must dash off now as I do not want to miss a thing!!!

Monday, February 14, 2011

Ms. March Guest Designer at the Cricutolics Forum


 Top of the mornin' to you!

I am this month's guest designer at the Cricutolics Forum over in the UK. If you have not previously visited the Cricutolics Forum please do follow the link and pop on over.  It is a fun site.

Given that I am guest designing on an International forum, I decided to skip right past Presidents' Day (because really, the UK doesn't care about our silly colonial celebration!) and jump ahead to a fun holiday we can all sink out teeth into.... St. Patrick's Day!!!  I feel certain that my Irish ancestors are all cheering this choice, just as surely as I know the Scottish and English ancestors are rolling their eyes in my direction!


I used three cartridges to create this card, George and Basic Shapes for the base card and the printed sections, Designer's Calendar for the large and the single shamrocks as well as the hat, and A Child's Year for the shamrock border.   My design calls for a white base card, green and white solid cardstock, and three to four Celtic or green print papers.


 The cut file for this card is available for free download in the left column of the blog, under the title Shuttered Tri-Fold St. Patrick's Day Card.     Even if you do not want to create a St. Patty's card, the cut file does contain the base card pattern.

Monday, January 17, 2011

Love on a half shell?


Happy Monday.  I have a new card, a Valentine, to share with you today.  The challenge cut for the week at the Bitten by the Bug 2 blog was selected by my sweet, sweet design team sister, Krista.  Krista selected the Armadillo from the Birthday Bash cartridge, but then decided to also include a bird option.  I did not have the chosen cartridge so I used George and Basic Shapes and built my Armadillo the old school way - using geometric shapes welded together in George.


I am going to confess that I had no idea what to do with the Armadillo cut - but the idea of the Armadillo was so cute that I had to go with it.  In the end I decided to create a pink Armadillo and put her on a Valentine card.  

I was away for the weekend, on one of our scrappy girl lake adventures.  My friends tried to come up with Valentine puns for my card, but they were mostly lacking..... "I shell always love you", You're a shell of a Valentine", etc.  I think we should all keep our day jobs and NOT go into comedy or pun writing.


So instead of a "punny" tag, I decided to use part of the valentine circle set from the Cutting Cafe.  I layered a 1 inch circle over a 2 inch circle, creating a new center, but using the REMEMBER circle.  I inked the circle edges and matted them on two layers of Spellbinder Nestabilities, a Lacey Circle and a Scalloped Circle.


I did manage to complete quite a few projects last weekend.  I have several cards and layouts to share in the coming days.  In the meantime do go by BBTB2 and check out all of the armadillo and bird projects.  Also, be sure to hope over to the Cutting Cafe and shop the extensive line of printable stamps.